|
Supplies: 2 players, Mancala board with 48 Stones
Video: https://www.youtube.com/watch?v=2T0jeY-BxU4&t=1s Setup The board is placed between the two players, and four stones are placed in each cup. Each player only plays from the 6 cups directly in front of him/her. The large cups at the ends of the board are the Mancalas. Each player's own Mancala is to the right. The stones only move counterclockwise to the right. Objective The object of the game is to get more stones in your Mancala than your opponent gets in his/her Mancala. Game Play The stones from a cup are picked up, and one stone is placed in each cup, starting to the right. If the last stone played ends in your Mancala, you move again.If a player’s last stone ends in an empty cup on his/her own side, the stones from the opposite side are captured. The capturing stone and the captured stones on the opposite side all go to the player’s Mancala. When a player has removed all the stones from his/her side, the game is over. Any stones that are in cups on the other side are moved to that player’s Mancala. Scoring The stones in each Mancala are counted. The player with more stones wins the game.Rule A player only plays stones into his/her own Mancala. How to make a Mancala BoardSupplies: egg carton, a small container, and 48 little pieces of cut paper of any type Instructions:1. Separate the lid and the bottom of the egg carton. Like the first image2. The small container will be used for your mancala3. The little pieces of paper will be your stones 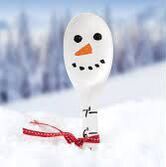 Video Link https://www.crayola.com/crafts/snowman-snow-ruler-craft/ Supplies: Paint, paint brush, pencil, a plate, wooden spoon, ruler/tape measure/ Yardstick, ribbon/ fabric Instructions 1. Cover Spoon in white paint. Let it dry for 1-2 hours. Apply a second coat of paint. Dry 1-2 hours. 2. Use a ruler/ tape measure/ yard stick and pencil to mark 1 inch increments on the spoon’s handle. 3. Paint facial features on bowl of the spoon. 4. Paint over pencil measurements. Let all paint steps dry 1-2 hours. Repeat if necessary. 5. Tie ribbon/ fabric around neck of spoon. 6. Place in the snow to measure how much has accumulated! 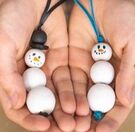 Video Link: http://make-it-your-own.com/silvery-snow-snow-person-ornament/ Supplies: White Paint, 3 wooden balls, Paint Brush, BBQ Skewer/ chop stick, Ribbon/ Cord, Thin Markers, Tiny piece of fabric/ ribbon, and a tall glass Instructions 1. Place wooden balls onto chop sticks 2. Using the white paint, pain the wooden balls. Let them dry. Repeat if needed and then clean off your brush. 3. Using the tip of your paint brush, dip lightly into the orange paint. Make a small carrot nose by drawing a triangle on its side. Let it dry and clean off your brush. 4. Using the tip of your paint brush, Dip lightly into the black paint . With the ball that will be the snowman face make two dabs for the eyes. Use the tip to also make a coal smile. Let it dry. 5. Using the tip of your paint brush. Dip it lightly into the black paint. With the ball that will be the snowman stomach, dab 3 vertical dots. This will make the coal buttons. Let dry and clean off brush 6. Once everything is dry , put your snowman together on the string and tie a knot. 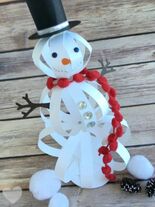 Supplies 1 piece of 12 x 12 white card stock, Scissors, 1 piece of brown cardstock, glue, 6 paper brads, markers and other decoration Instructions 1. Cut 8 Strips of White Card Stock at 1/2” x 3-1/2” 2. Cut 8 strips of white card stock at 1/2” x 4-3/4” 3. Cut 8 Strips of white card stock at 1/2” 6-1/4” 4. Use a piercing tool to punch a hole in the ends of all the strips. Stack the strips together so that you can line up the hole punch. 5. Place a brad in one end and then wrap the pieces of card stock to the other end. 6. Glue the tree arms into place. 7. Decorate your snowman |
AuthorMilford Library Staff Archives
February 2023
|
|




 RSS Feed
