 Ingredients: Pretzel rods Wax Paper Piping Bags White candy melts Green candy melts Blue candy melts Red candy melts Black candy melts Mini M&M candies Assorted star sprinkles, if desired HOW TO MAKE THESE STAR WARS PARTY FOOD LIGHT SABRES1. Melt the candy coating according to package directions giving special care not to overheat the candy. If the candy coating is overheated, it will be too thick. You can add 2 teaspoons of vegetable shortening or coconut oil to help thin the candy but do not add any other type of liquid as the candy will seize and harden. 2.Pour candy coating over two-thirds of the pretzel rod and shake gently to remove excess. If applying sprinkles, do so immediately rotating the pretzel rods to coat all sides.Larger sprinkles work best if placed individually. Place pretzel rod on waxed paper or cooling rack. (Cook’s notes: Waxed paper makes for easier release.) If creating the lightsabers, allow initial candy coating to set completely. 3. Then, transfer melted black candy to a piping bag or freezer bag with the corner snipped. Drizzle over the end where the candy meets the pretzel. Before the pretzel sets, gently pick it up and move to clean wax paper. 4.Press two mini M&Ms into the black candy melts. 5.Let pretzel rods dry completely before packaging or serving. 6.Store in an airtight container at room temperature. Placing in the refrigerator may cause the pretzel to soften. 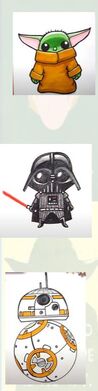 How to Draw Baby Yoda
Materials: pencil, paper, materials to color with( optional), device that connects to the internet To watch the videos of how to draw: https://youtu.be/a1NT7aWr_ow How to Draw Darth Vader Materials: pencil, paper, materials to color with( optional), device that connects to the internet To watch the videos of how to draw: https://youtu.be/h3aV0dyHHn4 How to Draw BB-8 Materials: pencil, paper, materials to color with( optional), device that connects to the internet To watch the videos of how to draw: https://youtu.be/LUZyWszwsfs 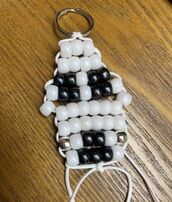 Materials: 1 yard white plastic lacing 1 lanyard hook or keyring 29 white pony beads 13 black pony beads 2 silver pony beads Scissors Special Instructions: Picture instruction s are located on the back Fold the lacing in half. Loop the lacing around the keychain. Pull tight. Start stringing beads. Row 1—3 white beads Row 2—4 white beads Row 3—2 black beads, 1 white bead, 2 black beads Row 4— 1 white bead, 2 black beads, 1 white bead, 2 black beads, 1 white beads Row 5— 1 white bead on each string, Just slide one on each side and leave them Row 6— 6 white beads Row 7— 6 white beads Row 8—1 silver bead,1 white bead, 2 black beads, 1 white bead, 1 silver bead Row 9— 1 white bead, 3 black beads, 1 white bead Tie a double knot 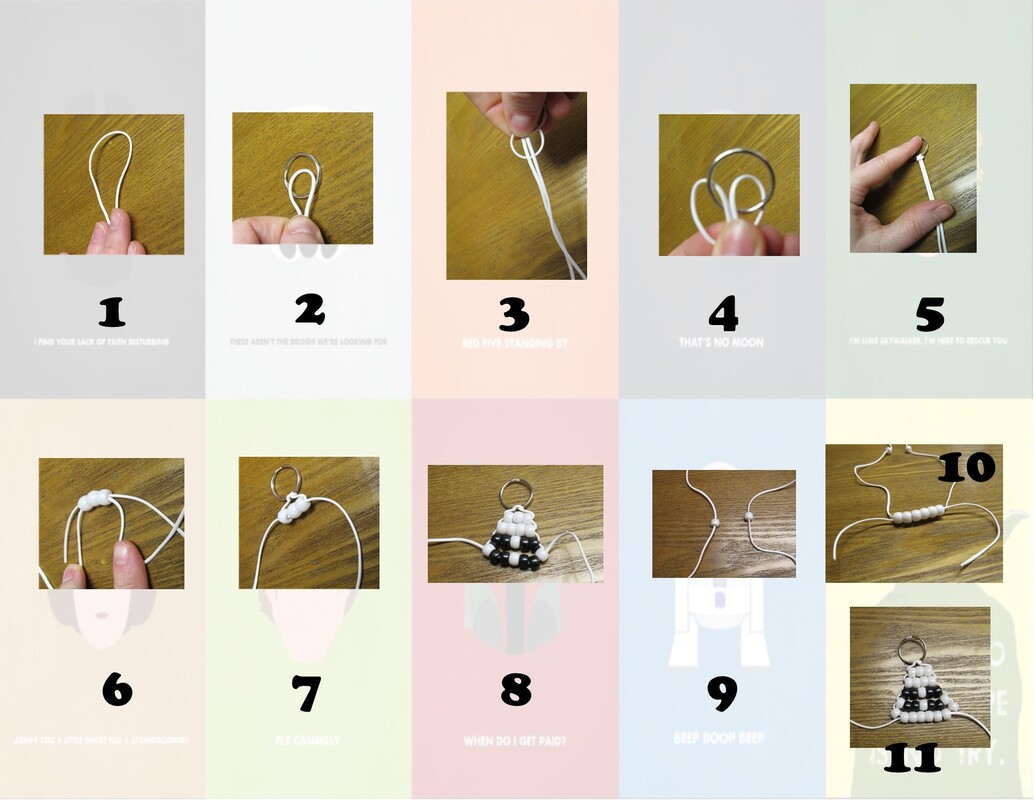  Ingredients: Wooden lollipop sticks, Popsicle sticks,
Clothes pins, Wide mouth, quart mason jars, 1 cup water, plus extra for seeding the sticks, 3 cups sugar, plus extra for seeding the sticks, Food coloring (we used gel for deeper colors), Flavor extract, if desired Instructions 1. Dip wooden sticks into water and then roll in sugar. Be sure to only add sugar where you want the candy to grow on the stick. This step allows the stick to “seed” the sugar crystals. Place on a flat surface to dry. 2. Add sugar and water into a large pot. Our pot was a 5-quart stainless steel Dutch oven. 3. Stir the sugar water constantly, bringing to a boil over medium heat. Add food coloring of choice and flavor, if desired. Stir well and remove from heat immediately. 4. Allow for the solution to rest for 20 minutes. 5. Pour the solution into a mason jar. 6. Place a popsicle stick over the mouth of the jar. 7. Submerge the seeded part of your wooden lollipop stick into the mason jar, leaving at least 1 inch between the bottom of the stick and the bottom of the jar. 8. Clamp a clothespin on to the wooden lollipop stick and place it into the sugar solution with the seeded side down. 9. Ensure the jar is placed in a clean location where it can stay undisturbed for 5 days. 10. If you want to check the growth on the sugar crystals, use a flashlight to shine through the jars. If you notice that crystals are growing on the sides of the jar, it may be because the jar was not thoroughly cleaned before the process. 11. If you notice a thick sugar layer growing over the top of the solution, this is okay. It is to be expected during the process and should be left undisturbed until the candy is ready to be removed. 12. When the candy is ready to be removed (ie.: the 5th day), use a spoon to crack the sugar crust and pull it away from the stick. 13. Carefully lift the candy from the mason jar and transfer to a clean, empty jar to dry. 14. It is possible that the candy has attached itself to the sides of the jar. Use a knife to gently chip away at the sides if this is the case. 15. If the candy is attached to the bottom, chances are high that you will not be able to remove the candy from the jar. Notes: For every four sticks of candy, we had one complete failure and one misshapen candy. We prefer using wide mouth and deep jars (about quart-size). It makes the candy-making process a lot easier. Beware of jars with thin glass - they may crack when the hot sugar solution is added due to the sudden temperature change. If you’re using jars that have thin glass, we recommend heating the jars first by placing them under hot running water. For each color, use 1 cup of water and 3 cups of sugar - these measurements allow for enough solution to cover each stick completely. Be sure to wash your pot thoroughly between batches. If there is any leftover sugar from a previous batch, it will change your new sugar solution. Avoid using paper lollipop sticks as they can swell and mold. We used rock candy sticks from Amazon. Ensure that your mason jars are perfectly clean with smooth inner walls because sugar crystals will cling on to anything. Flavorings and extracts with color will change the color of the final product. If you want consistency in your colors, then we recommend only using clear extracts. Allow the crystals to grow undisturbed. Even cracking the crystals on top of the solution can change the final rock candy. Once you place the sticks in the solution, do not remove them until you are sure you are done |
AuthorMilford Library Staff Archives
February 2023
|

|


 RSS Feed
